


Banded overhead presses might be on your radar if you’re working out at home with limited equipment or if you’re trying to bust through sticking points caused by a weak lockout.
Whatever the reason, you’re likely wondering if this exercise is worth incorporating, how to set it up, and how to perform it correctly.
Banded overhead presses are a great tool to help build lockout strength in your overhead press. You can use a band by itself to warm up for heavier loads or to add in some extra volume. Alternatively, you can use bands to augment your barbell or dumbbell overhead presses and work through weak points.
Below, I will discuss in-depth the benefits of a banded overhead press, analyze the different variations to the movement, and will teach you how to properly set up the bands to avoid common mistakes.
Key Takeaways
What Is A Banded Overhead Press?
A banded overhead press looks just as it sounds; it involves pressing overhead using a resistance band.
It is a great movement that primarily targets your shoulder muscles, but will also indirectly target your core, traps, and triceps, depending on what variation of the movement you do.
This exercise can be done with the band alone, or by using the band to provide additional stimulus and weight to a barbell or dumbbell overhead press.
When completing a barbell or dumbbell banded overhead press, note that the added band tension means that the weight will get heavier as you get closer to the top of the movement, and the movement will be easier the closer you get to your shoulders.
This information can be helpful when you are choosing the resistance of your band since most bands come in a variety of weight resistances (more on what bands to get later).
Overhead Pressing Muscles
As briefly mentioned above, the major muscles worked in an overhead press, regardless of whether seated or standing, are the shoulders, but other muscle groups like your core and triceps are also involved.
The muscles of the shoulders include:
Seated overhead presses typically allow you to lift the most weight possible because you won’t have to work as hard to keep your core stable and you’ll have a more solid foundation to press from.
When performing standing overhead presses, you generally cannot lift as heavy, but you start recruiting more stabilizing muscles to keep your body in place as you press overhead.
Overhead pressing is a great sport-specific exercise to include for strength sports like Olympic lifting, Strongman, and Crossfit, but is also suitable for the average gym goer who wishes to grow their shoulders and increase their pressing power.
Related Articles:
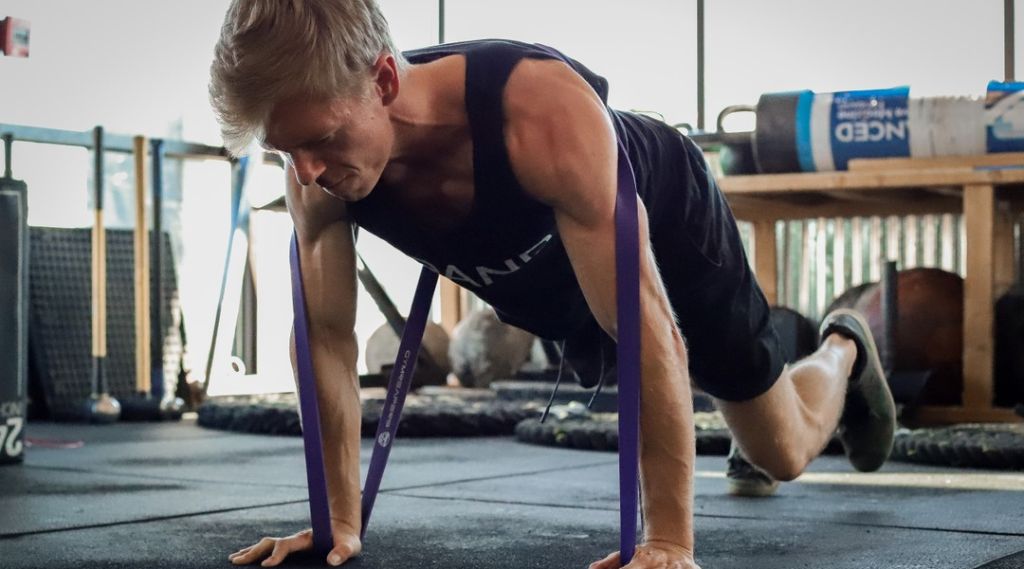
- How to Do Push Ups With Bands (the Proper Way)
- Banded Squats: Benefits, How-to, Common Mistakes
Benefits Of Banded Overhead Press
The benefits of training the overhead press with bands include:
- Stronger Lockouts: This is the biggest benefit of banded overhead presses. The resistance increases as the band stretches, so the more you practice pressing with a band, the stronger you will be in the lockout portion of the press.
- Increased Intensity/Burnout Sets: Incorporating banded presses has great hypertrophy benefits by helping you introduce a new stimulus for your body to adapt to. You can do a free-weight overhead press set, pick up a band, and then grind out some more reps with just band tension until failure.
- Great Warmup: Banded movements in general are great for warming up your joints. I often do banded overhead presses as a warmup to prepare my muscles and joints for heavier pressing movements.
- Constant Tension: Similar to the benefits provided by cables, bands give you more constant tension on your muscles throughout the entire movement, which can result in better muscle activation that leads to greater gains in strength and hypertrophy.
- More Core Engagement: Banded movements are more unstable, which will force you to engage your core, low back, and glutes more (especially when doing standing presses) to maintain the proper technique. This can help you become more resistant to injury over time.
- Potential To Lift Heavier Loads (reverse banded): If you want to strengthen the bottom portion of the press (off your shoulders) but make the lockout easier, you can implement reverse banded overhead presses. This is done by securing the bands to a sturdy bar above you.
How To Perform Banded Overhead Presses Correctly
To perform banded overhead presses correctly, you’ll need proper equipment and to decide which variation of the movement best suits your needs.
Necessary Equipment
Bands
First, you will need a band.
I highly recommend purchasing multiple bands so that you have different levels of resistance to choose from as you get stronger and to use for different variations of the movement.

The Gymreapers Military Resistance Band Set is a great full set of resistance bands. The set comes with bands that range in resistance from 20-150 lbs to satisfy every need possible for adding banded training exercises into your program.
If you do not want a full resistance band set, you can buy the bands individually. The Gymreapers Resistance Band will likely be the most helpful, particularly the red (15-35lbs), black (25-65lbs), or purple (30-85lbs) bands, which are commonly used for overhead pressing movements.

SHOP NOW
Joint Support
Additional supportive equipment that could be helpful for overhead pressing, especially if you’re using bands in combination with barbell or dumbbells to increase resistance are:
- Gymreapers 10MM Lever Belt: lifting belts are incredibly helpful for increasing intra-abdominal pressure, maintaining core stability and rigidity, and generating more force production. All of these benefits are directly helpful when you are doing challenging sets of standing overhead presses.

- Gymreapers Wrist Wraps - 18” Weightlifting Wrist Support: the weak link of every pressing movement is most commonly a lifter’s wrists. Gymreapers wrist wraps provide excellent support and stability to the wrist joint to ensure that you are lifting the maximum amount of weight as safely as possible.

SHOP NOW
Banded Overhead Press Variations
Banded overhead presses can be done in multiple variations:
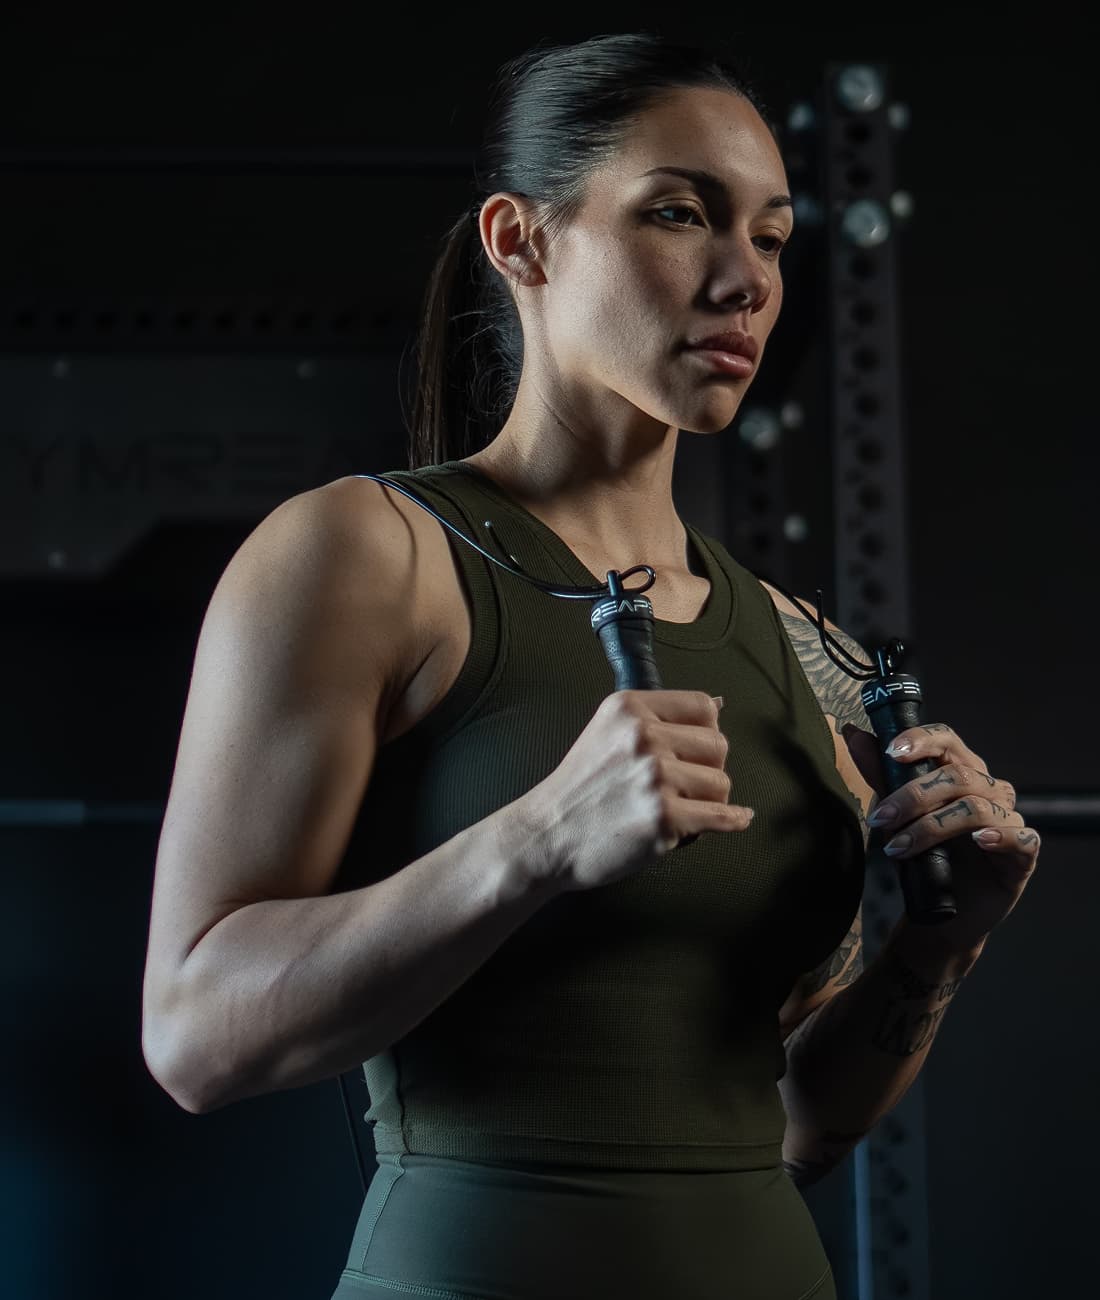
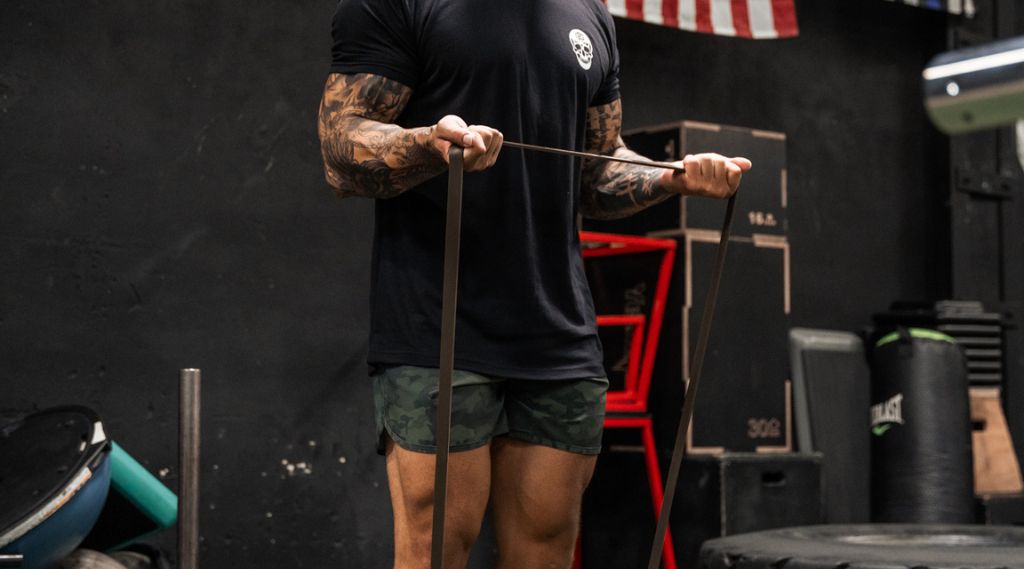
Variation #1: Resistance Band Alone
This variation requires the least amount of equipment, as you do the overhead press with the band acting as the only source of resistance.
This is a great exercise that serves many different people. It can be a great strength builder for those just getting into resistance training, is a helpful exercise for those rehabilitating an injured shoulder, or can be a great warm-up for more experienced lifters who are aiming to do a heavier pressing movement later in their workout.
This exercise can be done as either a single-arm or two-arm variation.
Most commonly, people will do a resistance band overhead press standing, and anchor the band under their feet (two-arm variation) or their foot (single-arm variation).
Once the band is secured, you will grab the other end of the band in your palm and simply press up and down overhead.
You can also do this seated on the ground or a bench. When doing this exercise in a seated position, remember that you have now shortened the range of motion, so the band tension will likely be easier unless you change how you anchor the band.
Note that banded movements alone tend to be easier than barbell or dumbbell variations, and usually require 15-30 reps to achieve a hypertrophy effect.
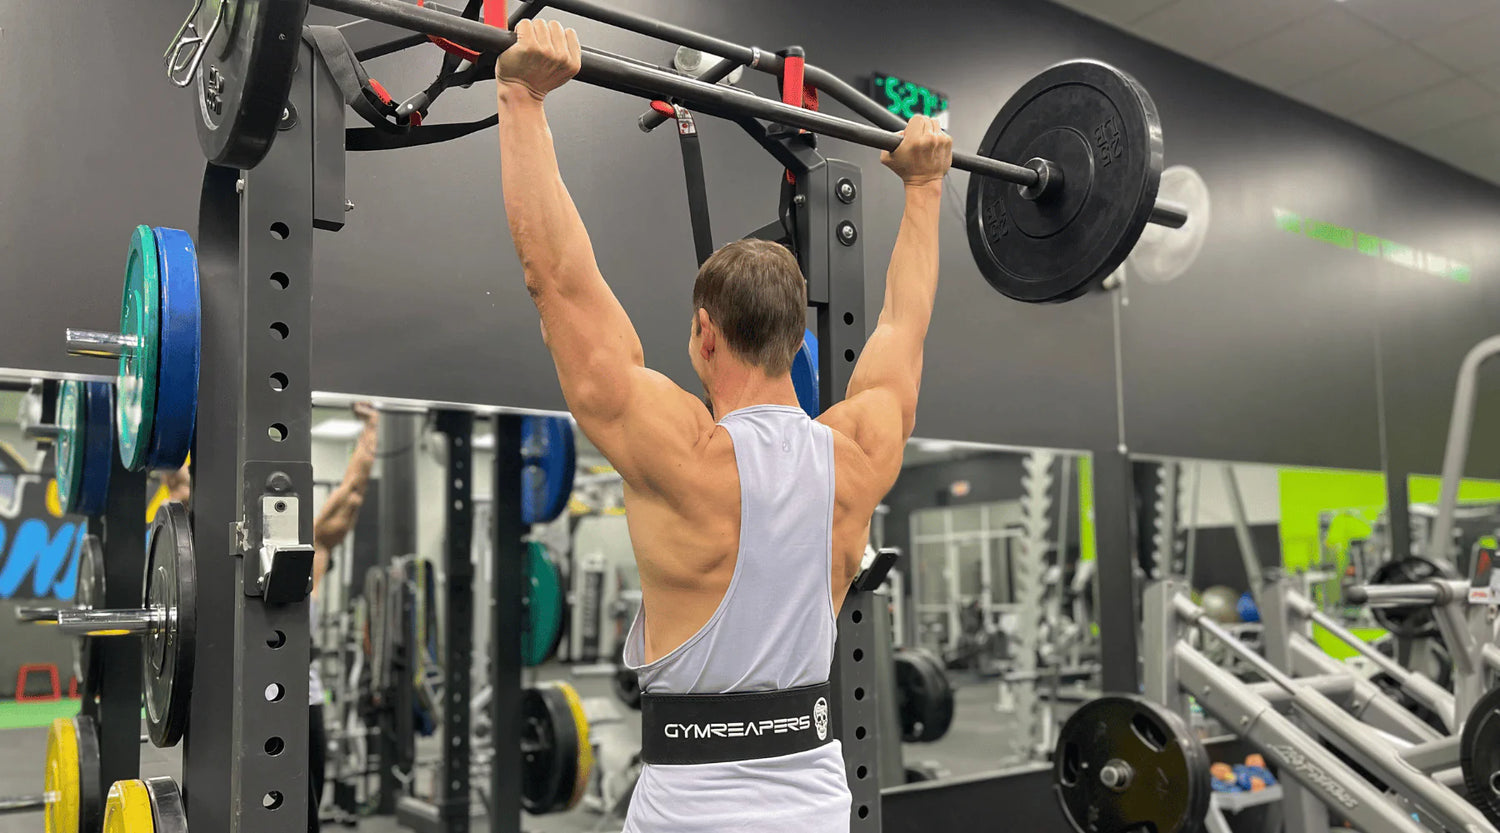
Variation #2: Barbell Banded Overhead Press
A second variation for banded overhead presses is the barbell banded overhead press. This exercise can be done either seated or standing and is a great way to improve your lockout and increase the involvement of your triceps.
To set this exercise up, you would first set your barbell up in the rack as normal (around armpit height).
Next, you will have to find an anchor point on the ground or some other place directly below the barbell. Most commonly, this will be the safety arms, the bottom of your rack, anything bolted to the ground, or a very heavy dumbbell.
See this video for a demonstration of how to secure the bands:
Once your bands are secured, perform the overhead press like normal. Remember that due to the increasing bar tension, this movement will feel easier when the bar is near your chest and will be harder the closer you get to the lockout.
Pro tip: Make sure that whatever you anchor your bands to, is directly below the point that you secure the band to the barbell. This creates optimal 90-degree angles and will avoid throwing you off balance or changing your bar path.
Variation #3: Dumbbell Banded Overhead Press
A final common variation of the banded overhead press is very similar to the barbell press, but instead using a dumbbell.
Note that this exercise is more commonly done in a seated position as opposed to the more common standing position found in the barbell press. This is simply because it is easier to anchor the band to a dumbbell in a seated position.
Here’s what it should look like:
When performing this movement, it is easiest to wrap the band around the bottom of the bench or chair that you are sitting on.
Next, simply secure the band around the dumbbells. Aim to place the band close to the center of the handle, so you can press it evenly and hold onto the band with your hands.
4 Banded Overhead Press Common Mistakes (And How To Fix Them)
1. Not Using Enough Weight
One of the major mistakes I see when people are doing banded overhead presses is that they are not using enough resistance, or they are not doing enough reps.
If you are only using the band for resistance (variation #1), the minimum number of reps you should be doing is 15. Don’t be afraid to go over 20-30 reps because growth will only occur if you’re getting close to failure.
Additionally, I notice that plenty of people are misjudging the weight (resistance level) of the band, and therefore not challenging themselves enough in their training.
Fix: Use Appropriate Loads & Increase Them Over Time
The easiest fix for not using enough weight is to simply increase the amount of weight that you’re using by choosing a heavier band.
For example, if you’re using a red band that adds 15-35 lbs of resistance and you can do well over 30 reps without fatiguing then switch to a black or purple band that offers more resistance.
One strategy that I like to use for tracking my progression over time is to learn how much resistance the band is providing based on how far it is stretched while I’m pressing.
The easiest way to do this, as shown in this video, is with a fishing scale.
Once you know the actual band tension you are adding to your lift, you can accurately track it and progressively increase it in your training, which leads to better long-term gains.
At the very least, make an effort to continue pushing yourself over time to give your body a reason to adapt.
2. Putting The Band On the Sharp Knurling
A second major issue I see, primarily in powerlifting gyms, is placing the band directly onto a barbell with a very sharp knurling when performing Barbell Banded Overhead Presses (Variation #2).
Placing the band on sharp knurling will dramatically reduce the lifespan of the band, as all the little knurling teeth on the barbell will be sawing through the band every time you do an overhead press.
Fix: Use a Barrier In Between the Band and the Bar
I like to solve this problem by placing something on the bar that the band will rest on.
The 3 things I use as barriers between the band and the bar are Fat Grips, towels, or squat pads used for squats or hip thrusts.
3. Incorrect Bar Path
Regardless of whether you are doing a barbell or dumbbell banded overhead press, you will want the weight to move with a similar bar path.
Ideally, you will have your feet hip-width apart, have the weight in your hands just outside your shoulders, will have your wrists relatively straight and forearms vertical, and will keep your elbows slightly in front of the bar when you initiate the press.
This should result in improved tension in your upper back, and you should be able to tuck your chin, squeeze your glutes and core, and press the weight overhead.
Once the weight clears the top of your head, you should be able to press your head through your arms and shrug your shoulders.
This is the best technique, but I often see people struggling to keep this bar path consistent once they add a band to the equation.
It’s common to see lifters pressing too far forward, too far backward, or a combination of the two as they try to keep the bar or dumbbell stable against band tension.
Fix: Anchor the Band Directly Beneath Where You Will Be Pressing
Although bands do require more stability and core engagement, this problem can still be mitigated by properly anchoring the band directly underneath where you are pressing.
Do not anchor the band directly underneath the bar when it is in the rack.
Instead, tie the band in a location that will be approximately directly underneath the bar (or dumbbell) when you are performing the exercise.
This will ensure the tension is only being applied to the bar (or dumbbell) in a vertical plane, and you will not have to fight against unwanted horizontal forces.
4. Not Using Full Range of Motion
The main reason you may be performing a banded overhead press is to train your lockout strength and get past sticking points.
So, it becomes a problem when you’re not fully locking out a banded overhead press.
If you’re failing to lockout because of the tension that the band is providing then you are not allowing the band to work its magic. You must fully lock out your arms to develop strength in that range of motion.
Fix: Reduce Band Tension To Lock Out Every Rep
The fix to this mistake is simple.
If you weren’t aware that this was the correct technique, then simply make the adjustment and be more intentional with your lockout.
If locking out your arms just isn’t possible because the tension at the top of the rep is too much for your muscles to overcome, then reduce the band tension so that you can complete the full range of motion.
How To Incorporate Banded Overhead Press Into Your Workout Plan
The best way to incorporate banded overhead presses will depend on your specific goals and training structure, but there are a few general guidelines to consider.
- For band-only overhead presses (variation #1): I would integrate these into every single warmup for any pressing movement in your training program.
Do this single-arm, and pick a band that you can do 3-4 sets of 12-20 reps for a great warm-up.
- For banded barbell overhead presses (variation #2): I would implement this as my primary push movement for the day. I recommend doing this movement once a week for 4 sets of 8-12.
If you want to get extra volume in, strip the weight after your last set and do a burnout set of just the bands and the bar. This will definitely fatigue and grow your delts.
- For banded dumbbell overhead presses (variation #3): I would implement these as a secondary pressing movement (an accessory movement rather than your main pressing movement).
I would recommend this movement 1-2 times a week for 6-8 total sets of 10-15 reps per set, following a main movement like the bench press.
When picking a load for a banded overhead press, I recommend loading half of whatever you do for a normal overhead press for the same sets and reps and then adding 60-75% of that load with band tension.
As a rough example, for someone that can barbell overhead press 100lbs for 4 sets of 12, I would load 50 pounds (45lb bar +2.5lbs each side) and then add another 60-75lbs of band tension so that the overall load at the very top of the rep is 110-125 lbs.
- Related: How To Do Banded Push-Ups
Leave a comment
All comments are moderated before being published.
This site is protected by hCaptcha and the hCaptcha Privacy Policy and Terms of Service apply.