


A squat rack (whether a stand or cage) is often the staple of any gym, fitness, center, or garage gym. You’ve used one -- and if you haven’t then you came to the right place.
The versatility of this heavy-duty rig is unlike any other piece of equipment. Whether you’re an amateur weightlifter or an elite trainer, you can rely on a squat rack (or power rack) for compound movements to increase muscle mass and strength.
If you’re contemplating setting up your squat rack or power rack for a home gym or just simply want to know more about the functionality and setup of either option, today’s post will give you everything you need to know.
When picking a rack for a garage gym, for example, you may often wonder which option is best — a squat rack or a power rack? Belt up because this entire post will break down the differences between a squat rack and power rack, how to use a squat rack or power rack, and everything in-between.
- What is a Squat Rack?
- How to Build a Power Rack
- Advantages and Disadvantages of a Squat Rack
- What is a Power Rack?
- How to Use a Power Rack
- Advantages and Disadvantages of a Power Rack
- Squat Rack vs. Power Rack

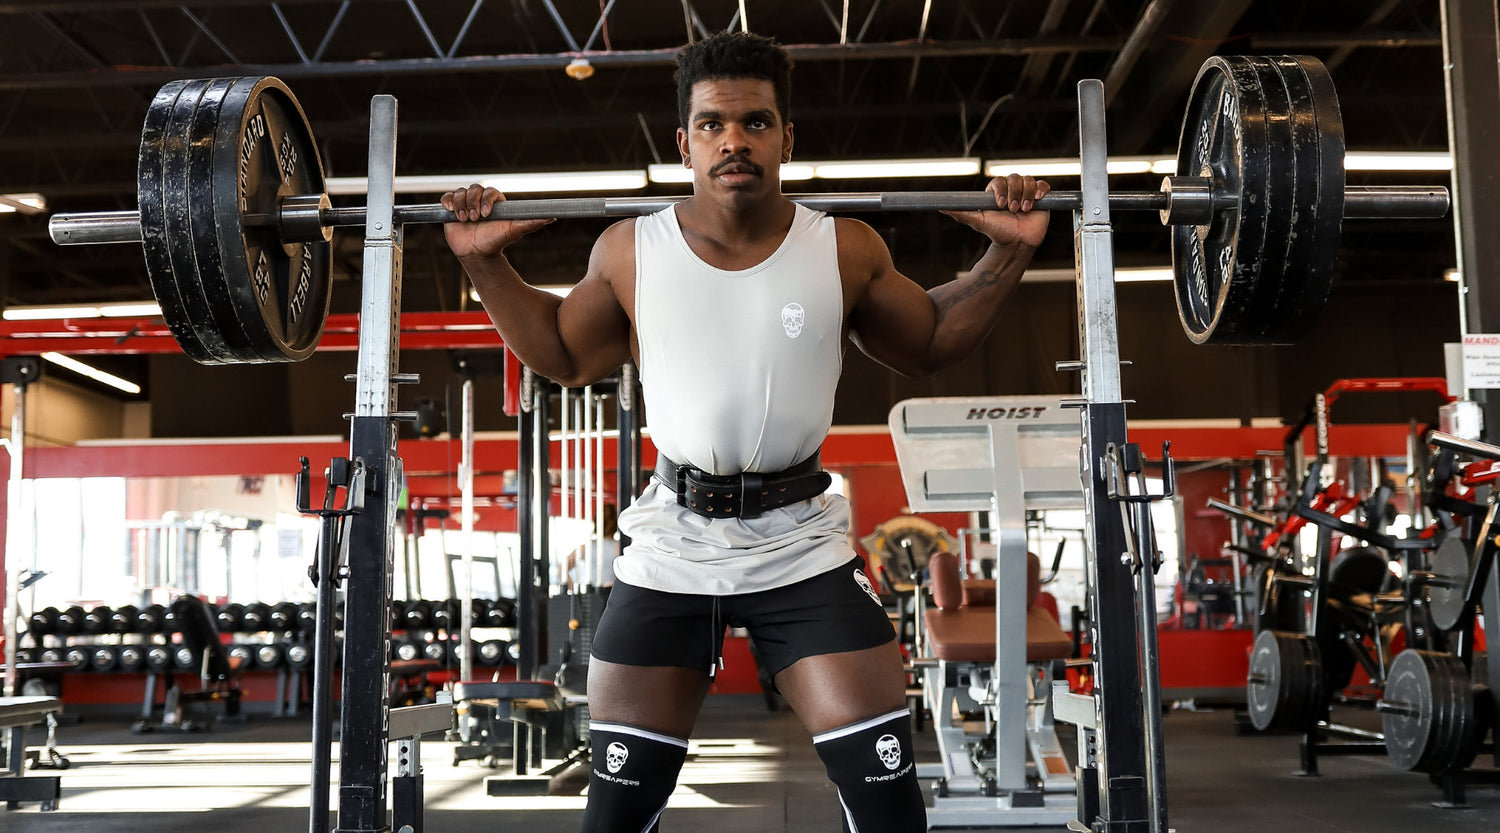
What is a Squat Rack?
First up, let’s cover the squat rack option and some of its advantages. A squat rack can sometimes be referred to as a squat stand. That’s because a squat rack looks pretty simple but it can be customized to add on accessories such as standard J-cups or even flat J-cups.
Most squat racks come with a pull up bar that runs across the width of the squat rack with an option for fat or skinny bar (in some cases both options are included).
Depending on the brand or type of squat rack, you might not notice a huge difference between a squat stand and a squat rack. That’s because a squat rack has the same building foundations as a power rack.
You can think of a squat rack as a compact version of a power rack. A squat rack can be customized and is a good starting investment if space and money are a factor in your decision-making.
How to Build a Power Rack
Assembling heavy equipment such as a power rack can seem intimidating. But what if I told you that it’s the same process as building a squat rack? Would that help you tackle the assembly process? The good news is that the framework of a power rack (such as uprights and accessories) are pretty similar to a squat rack, you just might have fewer pieces that come with a power rack.
To get started, you will need some tools, so grab your toolkit or borrow one that includes a socket wrench, a step ladder (to secure the top accessories such as a pull-up bar), and lastly the most important tool of all, a friend or spouse to help hold uprights and pieces while you secure them in place.
With the prep work in mind, you should also plan the setup location of where you’ll house your rack. Here are the steps you can take to successfully assemble your power rack or squat rack.
- Unbox the pieces and lay them out so you can visualize them easily
- Start with building the base by following the manual instructions which identify the pieces needed, bolts, and nuts, and washers
- When assembling the pieces, make sure they are facing the right way (as shown in most manuals), and as you assemble them fully tighten the bolts so that they are secure.
- Next, it’s time to go vertical and build the frame of the rack. Align the posts into the slots ensuring that the pre-drilled holes are all facing the same way.
- Don’t confuse the pre-drilled holes with the ones on the side of the posts, as those are made for extra storage.
- Once the vertices pieces are assembled, it’s time to work on the horizontal parts (including the pull-up bar and other accessories)
- You will likely need some help from someone so that they can hold the vertical pieces in place while you affix the horizontal pieces
- Make sure that you don’t fully tighten the bolts until the pieces are aligned and level
- Once the main pieces are bolted, do a final check and ensure that all the bolts are securely tightened.
- You can then begin adding the detachable accessories such as J-cups and spotter bars
- For extra stability and support, you can also bolt your rack to the floor by following a similar process you did in the steps above
- Make sure to perform regular cleaning and maintenance on your rack and inspect for any loose bolts.
Advantages and Disadvantages of a Squat Rack
1) More Variety for Exercises
If your training style is Olympic weightlifting exercises, which are common in CrossFit, then you might prefer a squat rack. Some find it easier to re-rack your weight on a squat rack if this is what you’re exclusively focused on.
2) Wider Support
With the wider base and extra bars, the squat rack or half rack provides an extra layer of support without feeling too constricted. This would be important if you are consistently using heavier weight loads.
3) Budget-Friendly
A squat rack is a budget-friendly option for home gyms because it involves fewer pieces and is a good starting position for most home gyms. You can find quality squat racks for sale around the $400 range, with some costing upwards of $800.
4) Weight Limit
Squat racks have a higher weight limit than a squat stand but it’s recommended to check before purchasing any equipment. Choose a squat rack with a weight limit of no less than 1,000 pounds.

What is a Power Rack?
For those who are looking for the ultimate home gym, a power rack is often said to be a necessity for real progress. So what is a power rack?
A power rack (sometimes referred to as a full rack or squat cage) is a set of metal bars that surround you during an exercise.
A power rack is most often used for barbell exercises such as squats, deadlifts, and bench presses. It’s similar to a squat rack except that it has more pieces and as mentioned above is essentially a sturdy metal cage with removable/adjustable accessories.
A power rack is preferred if you are working out without a spotter because of the added safety features such as pin pipes or strap safeties. These features help you lift safely and can catch the barbell if you fail on a heavy set of squats, or as you’re working on increasing your bench press.
Again, the biggest difference between a squat rack and a power rack is the safety features that can be adjusted to your desired level of performance. This topic is covered in depth below under the “how to use a power rack” section.
How to Use a Power Rack
Most people have used a power rack before, but there are still a few key points to remember before and during lifting. Now, these elements may seem pretty natural to most, but they are good reminders of how to safely lift.
The first thing you should do when using any rack for squats is to adjust the position of the J-cups. These attachments are very easy to remove and re-adjust and should be placed just below shoulder level. The reason this is so important is that it makes it easier to re-rack the barbell — especially on heavy sets.
You never want to have the barbell position be too high (above shoulder height) because you’ll have to stand up on your toes to lift it in and out of starting position. This is particularly important when squatting.
You could lose your balance or even trip and that could be a serious disaster that can cause all sorts of injuries. Once the bar height is set, you can place the barbell on the J-cups and move on to the next step.

The next step is to set your pin safeties or strap safeties in place. These safeties should be approximately two inches below the position of your bottom squat. Doing this before your workout will set you up for success and you can lift in confidence knowing that you’re supported throughout each set.
You can then go back to the barbell and load the desired amount of bumper plates or iron plates. As you get ready to lift, make sure you step directly under the barbell as if you’re about to squat, stand up straight, and take a few steps back. Look down, adjust your foot placement, and perform your desired squat variation.
Once this is completed, walk back to the J-cups (starting position) and walk directly into them — do not lean in. Once you reach starting position, squat down slightly as you bend your knees and re-rack the barbell. You’ve now completed the correct process of unracking and re-racking a barbell when squatting.
If you’re doing an overhead press, the process is similar, except you’ll be setting the J-cups on the outside of the rack instead of on the inside. You typically don’t need to set any pin pipes or safeties when performing an overhead press.
One of the greatest thing about a power rack is that you can also use it as a bench press machine.
You’ll just need a flat or adjustable bench to get started. The first thing you’ll do again is to adjust your J-cups. The perfect way to find the right level for your J-cups when benching is to place your fist straight down into the bench and place the bar directly beneath the deltoid.
For your safety pins or straps, you’ll want to be laying flat on the bench and gauge where it lands on your chest. You can then re-rack the bar onto the J-cups you have already set up.
Advantages and Disadvantages of a Power Rack
1) Added Safety
As mentioned ahead a power rack is the safest option when it comes to heavy equipment for home or gym training. A power rack features a wide base, catch bars, and a high weight limit of up to 1500 lbs. These power rack features eliminate the need for a spotter.
2) Adapts to Exercises
Although CrossFit athletes may prefer a squat rack for their training, a power rack can also be adjusted to adapt to exercise such as overhead press, the snatch, and more. The downside is (based on preference) some find it easier to re-rack the weight on a squat rack.
3) Weight Limit
A well-built power rack has a weight limit of up to 1500 lbs, which is beyond what most professional athletes can lift. This criterion can be helpful when buying a power rack because you could opt for a lower weight limit depending on your level of fitness and training goals.
4) Requires Room
The size of a power rack is a double-edged sword: it’s great for safety but requires a lot of room. Price point: all that extra metal and bars add up. A power rack is going to hit your wallet harder than a squat stand or squat rack.

Squat Rack vs. Power Rack
When it comes down to it, there are a lot of functional similarities between a squat rack and a power rack, but their build is pretty different. So which is best for you? You might want to base your decision on these three major factors: budget, space, and goals.
If you’re new to weightlifting with a limited budget and minimal space in your home, you should probably start with a squat stand.
If you have been lifting for a while and you have excess cash to spend on a quality home gym, then upgrade your training and get yourself a power rack. This may be more money to fork over initially, but long-term this may serve your needs much better than a squat rack.
As you make your decision, remember the major differences between a squat rack and a power rack and how it applies to your training. If you have additional questions about squat racks or power racks, feel free to leave a comment below and we’re happy to help out.
Leave a comment
All comments are moderated before being published.
This site is protected by hCaptcha and the hCaptcha Privacy Policy and Terms of Service apply.