


If you’re interested in CrossFit or simply looking for new exercises to perform with your kettlebell, the clean & jerk should be a staple exercise in your routine.
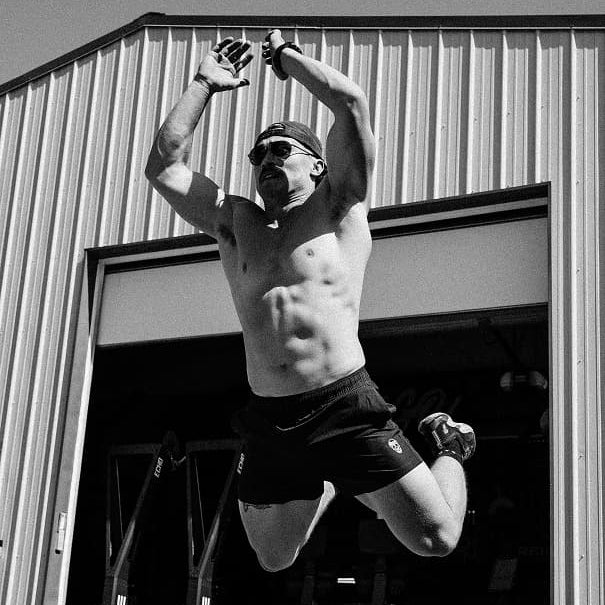
So, what is the kettlebell clean and jerk? The kettlebell clean and jerk is an explosive exercise that improves power development. The movement can be broken down into two separate portions, the first being the transition of the kettlebell from the floor to the shoulders, and the second being from the shoulders to an overhead position.
In this article, I will discuss the benefits of performing kettlebell clean and jerks, how to do them correctly, and the 4 common mistakes you should avoid (and how to fix them).
Key Takeaways
Kettlebell Clean & Jerk: Anatomy Overview
The muscles involved in the kettlebell clean and jerk are:
These muscles work together to help execute the kettlebell clean and jerk, which is why it is considered a full-body exercise and it requires higher levels of muscle coordination.
Benefits Of Clean & Jerks With A Kettlebell

The benefits of kettlebell clean & jerks include:
- Improves Weightlifting Performance. Weightlifting requires total body expression of strength and power. Although performing clean & jerks with a kettlebell isn’t exactly like barbell olympic lifting, there is still a lot of carryover for power and strength development which can improve your weightlifting performance.
- Improved Back and Core Stability. Kettlebell clean & jerks are a complex multi-joint movement that requires core and back stabilization to maintain positioning during the lifting of the weight.
You could even use kettlebell clean & jerks as a therapeutic exercise for improving back pain.
- Improved Overhead Pressing Strength. Being strong and stable in an overhead position is a fundamental skill for performance athletes. The jerk phase of this movement requires strength, power, and stability to move heavier loads into the overhead position.
This has direct carry-over to movements such as throwing or other lifting movements such as bench press, overhead press, snatch, and shoulder press.
- Improved Total Body Coordination. Kettlebells require an immense amount of balance and coordination to pull the weight from the floor to the front rack position and then into the overhead position.
Developing balance and coordination by kettlebell clean and jerks can be beneficial for older populations who want to decrease their risk of falls, or athletic populations who want to increase their dexterity for their sport.
How To Do A Kettlebell Clean & Jerk
Here’s how to perform kettlebell clean & jerks:
- Stand with your feet just outside of hip-width apart.
- Place a kettlebell between your legs.
- Load your glutes and hamstrings by hinging at the hips.
- Grab the kettlebell with one hand and engage the upper back to keep it from rounding.
- Push the ground away with your legs as you snap your hips forward, letting the kettlebell glide upward.
- Continue the upward momentum of the kettlebell by fully extending the legs and shrugging through the shoulders.
- Rotate your arm around the kettlebell to catch it in the front rack position.
- Break at the hips and knees to load the glutes and hamstrings.
- Snap the hips and quads into extension while subsequently driving the kettlebell upward to receive it with your arm locked out overhead.
- Let the kettlebell fall back between your legs and then repeat the previous steps for the desired amount of repetitions.
4 Common Mistakes With Kettlebell Clean & Jerks

To maximize the benefits of the kettlebell clean and jerk and reduce the risk of injury, avoid the following mistakes.
Mistake #1: Underutilization Of The Lower Body Muscles
Oftentimes lifters try to perform the clean & jerk using only their upper body, but this severely limits how much weight you can lift and increases your risk of injury.
Instead, the lower body muscles should be responsible for lifting the weight up and your arms should simply follow through to complete the movement.
Knowing how to load the glutes and hamstrings, and how to transition into the front rack position is fundamental for proper technical execution.
How To Fix
To improve lower body muscular involvement, let the arms hang loose in front of you when grabbing the kettlebell. The hands should simply act as hooks and your focus should be on maintaining tension in the legs and the upper back.
Use your legs to stand up with the weight and pull the kettlebell with your arm into the upright row position at the last possible second of hip extension. This will minimize upper body involvement and maximize the involvement of the lower body muscles.
Mistake #2: Poor Timing Of The Pull, Transition, Or Jerk
Another common mistake with the clean & jerk is messing up the timing between the 3 different portions of the movement (the pull, transition, or jerk).
Pulling too soon can result in a reduction in power output and can also place you in a compromised position increasing the risk of injury.
Also, if you transition from the pull to the front rack position too soon it can result in a loss of power, but if the transition is too late, the kettlebell can end up in front of you and cause you to lose power as well.
During the jerk, if the pressing motion is made too soon or too late it can decrease the momentum from the lower body and force you to “muscle the weight up” which places more stress on your shoulders and limits how much you can lift overhead.
How To Fix
Here is how we can address each of these timing issues during the kettlebell clean and jerk:
- Focus on building tension off the floor by tightening the lats (squeezing the armpits shut), having a proud open chest, and loading the glutes and hamstrings. Upon achieving tension in these key areas you can begin to initiate the pull by driving your legs into the floor.
- The transition phase is best initiated when the kettlebell is at the hip socket. As the kettlebell reaches hip height, you can start transitioning to the front rack position. This ensures that all the possible energy from the lower extremities transfers to the upper body to complete the rotation to the front rack position.
- Maximal leg drive is achieved during the jerk when the overhead push is initiated after the hip and knees are completely extended. This ensures that the legs do the majority of the work and the upper body is simply guiding the kettlebell overhead and locking it out.
Mistake #3: Letting The Kettlebell Drift Too Far Forward
If the kettlebell travels too far away from your center of mass then you will need to compensate by involving other muscle groups that typically wouldn’t be part of the lift. You’ll also have to work harder to get the kettlebell back toward you to receive it in the front rack position, which limits how much you’ll be able to lift.
How To Fix
To fix this make sure that the kettlebell sits between your legs at the beginning of the lift. During the transition phase, make sure that the kettlebell stays as close to your body as possible rather than swinging it out away from you.
When performing the jerk, focus on keeping the kettlebell stacked over the top of your body so that you form a straight line when the kettlebell is locked out overhead.
Mistake #4: Excessive Upper Back Rounding
The kettlebell clean & jerk starts from the floor and finishes overhead, so if your positioning from the floor is compromised then it will affect the rest of the movement.
It’s common for lifters to use poor mechanics, like excessively rounding the upper back, to pick up the weight. This may be due to a hip, hamstring, or upper back mobility issue forcing them to round their upper back to get into position.
It could also be a technical issue that occurs from not knowing how to effectively hinge at the hips, which also forces the upper back to round to pick up the weight.
How to Fix
There are several ways we can minimize upper back rounding to improve positioning during kettlebell clean and jerks:
- Open your chest when getting into the starting position. Having an open chest (puffing your chest up) will aid in effectively maintaining an upright posture at different points during the clean.
- Get into position by pushing the hips back. Loading the hips and hamstrings by hinging at the hips can minimize back rounding while placing a greater emphasis on proper loading of the lower body to pick the weight up.
- Maintain tension in the upper back. As you grab the kettlebell, remember the cue of “squeezing your armpits” as this will activate your lats and often help flatten out the upper back.
- Build and maintain a proper brace when setting up. Building intra-abdominal pressure by taking a big breath before the setup can assist in maintaining postural stiffness and decrease upper back rounding.
Best Kettlebells For Clean & Jerks

The ergonomic design of the Gymreapers Kettlebell makes it my go-to option for kettlebell clean & jerks. The durability of these cast-iron kettlebells allows me to throw them around without worrying about wear and tear.
These kettlebells come in a large range of sizes, including:
- 4 kg (9 lbs)
- 8 kg (18 lbs)
- 10 kg (22 lbs)
- 12 kg (26 lbs)
- 14 kg (31 lbs)
- 16 kg (35 lbs)
- 18 kg (40 lbs)
- 20 kg (44 lbs)
- 40 kg (88 lbs)
This allows you the versatility of loading the clean and jerk either for strength or power development. Heavier loads on this spectrum can help you build strength, whereas lighter loads can help you develop technique and power.
Finally, I like the design and logo as well. It’s sleek and fits nicely in a variety of weight room settings. The colored handles help differentiate the available loads as well making it very easy for setting up group workouts so that my athletes can differentiate between the weights.


Leave a comment
All comments are moderated before being published.
This site is protected by hCaptcha and the hCaptcha Privacy Policy and Terms of Service apply.