


If you’re working out at home with limited equipment, are on vacation, or are simply trying to add in some back volume to your training, banded bent over rows should be on your radar.
Banded bent over rows are a phenomenal exercise for developing the muscles in your back. You can use bands by themself to warm up for heavier loads, or they can be great for adding in extra volume. You can even use bands to augment your barbell or machine bent over rows with supersets.
To ensure you get the most out of your banded bent over rows, I’ll teach you how to properly perform the movement, highlight some common mistakes (and how to fix them), and discuss how you can implement them into your current routine.
Key Takeaways
Banded bent over rows primarily trains the muscles in your back (trapezius, rhomboids, lats, etc), your rear deltoids, and your biceps.
Banded bent over rows are often performed incorrectly, which can reduce their effectiveness and increase the risk of shoulder and lower back discomfort.
Banded bent over rows should be implemented into your weekly upper body training for a total of 4-6 sets of 10-12 reps.
Muscles Worked With Bent Over Rows

Bent over rows are a great upper body exercise where the primary focus is to hinge your hips to bend over, and then row some type of weight from your shins to your midsection in a straight line.
When performed properly, bent over rows typically engage the following muscles:
Latissimus Dorsi. More commonly referred to as your “lats,” these large, wing-like muscles make up a vast surface area on your back. The primary function of your lats is to adduct the arm (think of doing a pull-up or pulling a heavy object down from high up). The lats are a prime mover in most back exercises you do.
Spinal Erectors. Your spinal erectors are located in your lower back and are engaged whenever you hinge at your hips and load your torso. They are worked in a bent over row because they keep your torso stable in the bent-over position for the entire movement.
Rhomboids. Your rhomboids are the muscles that retract, elevate, and stabilize your scapula (shoulder blade). They are located in your upper back and are mainly targeted at the top range of motion in a row when you have pulled all the way in and are flexing your upper back.
Hamstrings and Glutes. Your hamstrings work isometrically (contract without changing position) to support you when you are in the bent over position. When you are hinging properly and performing rows, you can likely feel your hamstrings and glutes firing as they support you.
Trapezius. Your “traps” are another muscle in your upper back that gets heavily activated when doing rowing movements. You can target your traps more when doing bent over rows if you flare your elbows out when you row (when you keep them in tight, you are working more lats and rhomboids).
Rear Delts. Your rear delts make up the back of your shoulders and often get targeted in tandem with your traps. So, if you are doing rows to focus on the upper portion of your back, you will also be growing your rear delts.
This can be very helpful long-term, as having strong rear delts can reduce your risk of developing shoulder injuries caused by too many pressing movements.
Biceps. Finally, your biceps also get worked when you are doing any type of row. Your biceps are primarily responsible for elbow flexion (bending your arm), which is necessary in the row to bring the weight up to your torso.
Related Articles: Exercises for the Back With Resistance BandDeadlifts With a Band: Benefits, How-to, Common Mistakes
How to Do Banded Pull-ups (The Proper Way)How to Do Upright Row With Bands (The Proper Way)How to Do Inverted Rows With Bands (The Proper Way)How to Do Face Pulls With Bands (The Proper Way)
How To Do Bent Over Rows With Bands: Step-By-Step Guide
Here are step-by-step instructions as to how to properly perform bent over rows with a resistance band:
- Grab a looped resistance band. Preferably one that has enough resistance to challenge you, but not so much that you can’t bring the band to your chest in a controlled motion.
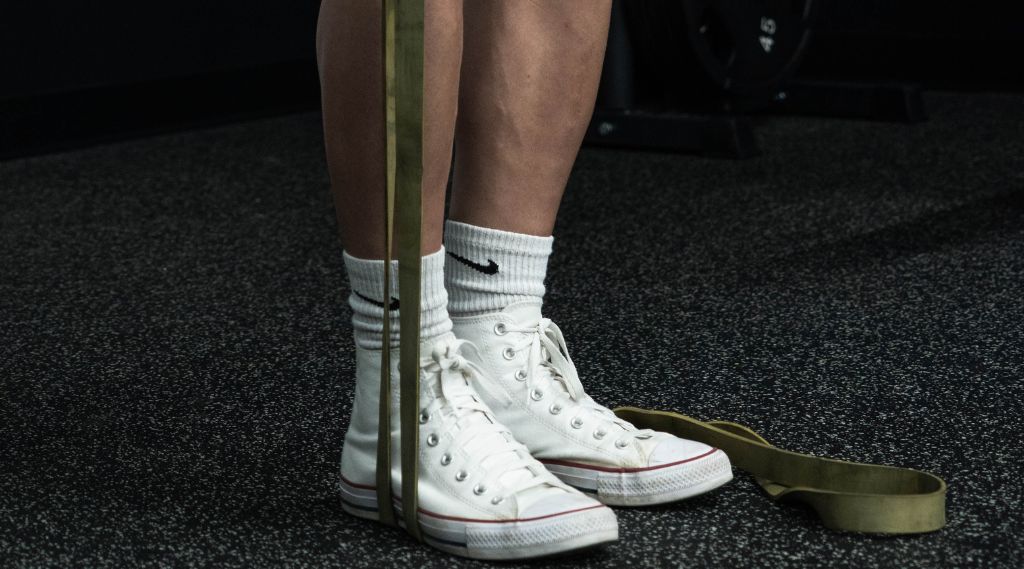
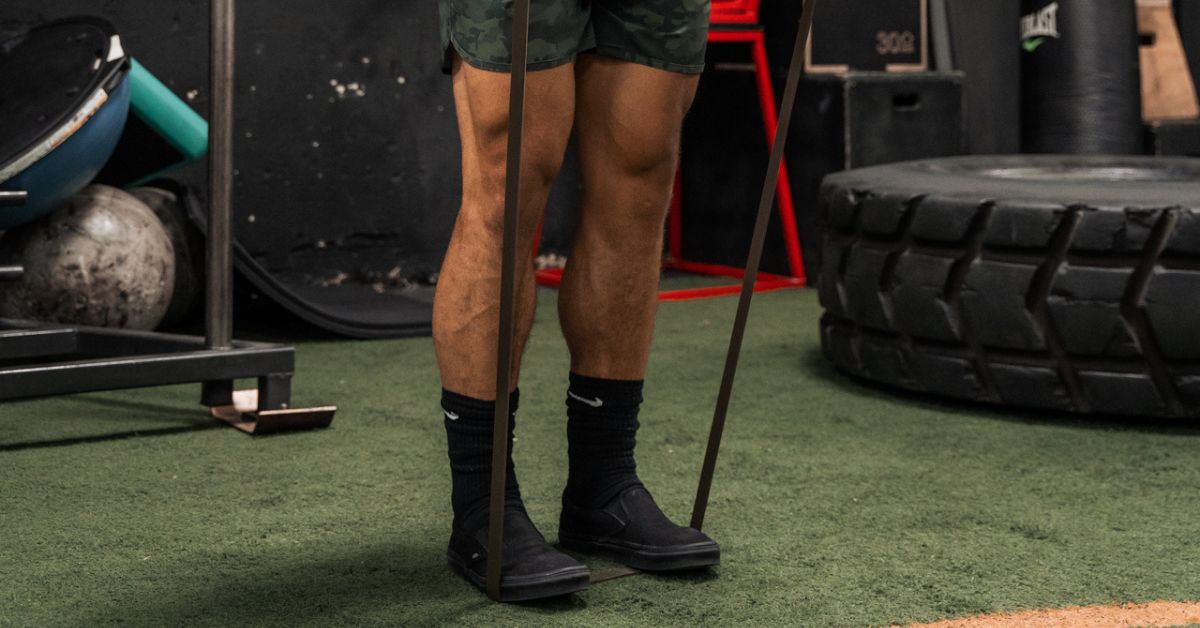
- Step over one end of the band with your feet in a shoulder-width stance. Pin that end of the band between your feet and the floor, while keeping the other end in your hands.
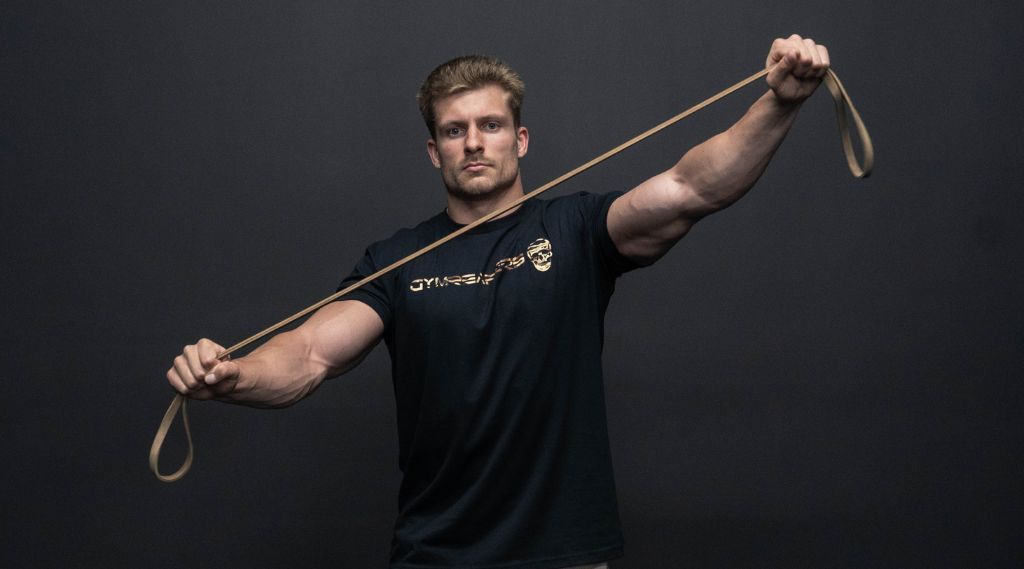
- Hold the band with an overhand (palms facing downward) shoulder-width grip.
- Hinge at your hips by pushing your butt slightly backward. You should feel a small amount of tension in your hamstrings, glutes, and lower back. Your torso can be anywhere from a 45-degree angle to parallel with the ground.
- Let your arms hang down while holding the band. Note that the band should not have any slack when your hands are in the bottom position.
- Retract your shoulder blades, brace your core, and inhale.
- Pull the band equally with both of your hands towards your ribs by pulling your elbows back behind you. A good point to aim for is your belly button.
- Pause briefly at the top while squeezing your back and your shoulders.
- Slowly lower the band back down to your start position.
- Exhale, breathe in again and repeat.
Note that this exercise can be varied depending upon your goals and your leverages.
- If you want to work more of your upper back, you will want to pull the band closer to your chest than your belly button.
- If you want to work more of your mid-back, you can pull the band lower.
- If you want more bicep involvement, try supinating your grip so that your palms are facing up when you pull.
Common Banded Bent Over Row Mistakes
Here are the 3 most common mistakes that I see from lifters performing banded bent over rows:
Mistake #1: Using Too Much Momentum
The first mistake that I see much too often with banded bent over rows is using too much momentum. By this, I mean swinging your body back and forth in an uncontrolled fashion.
People may do this for a variety of reasons, but the most common are: the weight is too heavy, they are unsure of proper form, or they are trying to squeeze out extra reps.
I understand these reasons, but when you start swinging your body, you are increasing the risk of injury and reducing muscle activation. This means that you are not only more likely to get hurt, but you are also reducing the benefits of the row.
How To Fix
Keep the movement more controlled by engaging your lower back, hamstrings, and glutes when you hinge. When these muscles are actively holding you in position, you will create a stronger base to pull from and reduce the use of momentum by locking your torso in place.
On top of remaining tight in your posterior chain, just be mindful as to whether or not you are actually feeling a squeeze in the right muscles (listed above) when you are performing the movement. If you aren’t, then think about lowering the resistance and dialing back in on the proper form and tempo.
Mistake #2: Using The Wrong Band
A second common mistake when doing banded bent over rows is simply using the wrong resistance band for the exercise.
This can go both ways. I commonly see lifters who can row 200+ pounds of free weight using the band with the least resistance, as well as lifters who row less than 50 pounds trying to use bands that give over double that in tension.
This mistake can go along with Mistake #1 since too much resistance can force you to swing your body, which we know reduces muscle activation and increases your risk of injury.
How To Fix
First, be honest with yourself. Start with a lighter resistance band that allows you to perform smooth repetitions with the proper form in the full range of motion.
Once you have assessed this band and how it felt, feel free to move up to a heavier band if appropriate.
You should use a band that allows you to perform controlled reps with a challenging squeeze at the top. If you notice yourself cheating your reps, go back to your lighter band. If you’re able to do 20+ reps without a challenge, then try a heavier band.
Mistake #3: Being Too Upright
To get the most out of your bent over rows, your torso needs to be at least bent to a 45-degree angle from the floor. This requires you to hinge your hips backward and drop your chest down toward the ground.
What happens to a lot of lifters is that as soon as their muscles begin to fatigue, they instinctively stand up taller and taller.
Yes, this makes the exercise easier to lift more weight, but it completely takes your posterior chain out of the movement, and it makes it almost impossible to target muscles in your mid to upper back.
How To Fix
Fixing this mistake requires you to go back to the basics, and to admit when the load you’re using is too heavy.
If you notice that your torso is too upright, noticeably changes as the set goes on, or even rises as you try to complete a rep, then you may need to lower the weight and reestablish proper technique.
When doing banded movements, the overall load should not be the goal. Instead, your goals should be focused on how good of a contraction you can get on your targeted muscles, and how much control you can exhibit throughout the movement against the constant tension.
Implementing Banded Bent Over Rows Into Your Training Routine

One of my favorite ways to implement banded bent over rows into my training routine is to perform them with a lighter band and do multiple high-rep burnout sets.
I will perform 2 sets of 10-12 easy reps to get warmed up before any training session that engages my lower back, upper back, or hamstrings (all of them).
Then, as the workout progresses and I have started to fatigue myself with free weights and machines, I will add banded bent over rows back into the equation in the form of drop sets, burnouts, or AMRAPS. This can be included on any back or leg day.
For example, here is how I would incorporate banded bent over rows into a back and bicep workout:
|
Exercise |
Sets |
Reps |
Rest |
Notes |
|
Banded Bent Over Row |
2 |
10-12 |
30 seconds |
Warmup, very easy with a controlled tempo |
|
1. Barbell bent over row |
3-4 |
6-8 |
90-120 seconds |
Main movement of the day, challenging |
|
2A. Lat Pulldowns |
4 |
8-10 |
120 seconds |
Wide grip |
|
2B. Banded Bent Over Row |
4 |
15 |
120 seconds |
Pick a band you can do for 15 easy reps. After every lat pulldown set, immediately do banded rows. After the last lat pulldown set, do AMRAP banded rows |
|
3. DB Bicep Hammer Curls |
4 |
12 |
90 seconds |
Focus on contraction |
|
4A. Single Arm Bicep Cable Curl |
2 |
20 |
60 seconds |
AMRAP set of Single Arm Banded Bent Over Row after both sets |
|
4B. Single Arm Banded Bent Over Row |
2 |
AMRAP |
60 seconds |
Take your rest only after the AMRAP |
Don’t be too afraid of overtraining when you add in banded bent-over rows. The overall weight, stress, and fatigue on your joints is quite low compared to most other exercises, so you can use them as a great filler to add in more volume.
However, you should be hyper-aware of your technique when doing these high-intensity AMRAP/burnout sets. Only do as many reps as you can until your form starts to break; don’t sacrifice control and technique for squeezing out a few extra reps.
Best Bands For Bent Over Rows
When looking to purchase bands that are perfect for bent over rows, I highly recommend getting a set of multiple bands. This will provide you with varying levels of resistance to choose from and will help you get the best gains long-term.

The military resistance band set by Gymreapers is a great set of bands and will make sure that you are properly equipped to get stronger, as they will allow you to perform bent over rows, and other back exercises as well.
These bands have a looped design and come in a variety of resistance levels to help you choose a level of resistance that suits your current abilities while allowing you to progress over time.
You can pick from several tension levels to see what matches your abilities:
- Desert Tan - 20 to 35 lbs.
- OD Green - 30 to 60 lbs.
- Dark Earth - 40 to 80 lbs.
- Ranger Green - 50 to 120 lbs.
- Coyote Brown - 60 to 150 lbs.
In my opinion, the best bands for bent over row variations will be the OD Green, Dark Earth, and Ranger Green.
If you still want to incorporate band training into your bent over rows, but do not want a full resistance band set, you can buy the bands individually.

The Gymreapers Resistance Band will likely be the most helpful, particularly the green (50-125 lbs) or blue (65-175lbs) bands, which are most commonly used for harder compound movements like bent over rows.
Lastly, it’s important to note that if you’re looking for the best value for money, the Military Resistance Band Set gives you 5 bands for about $100, while buying a band individually is $40-$50.
Leave a comment
All comments are moderated before being published.
This site is protected by hCaptcha and the hCaptcha Privacy Policy and Terms of Service apply.